Guide: Convert Bruker EBSD bcf files to hdf5
Published:
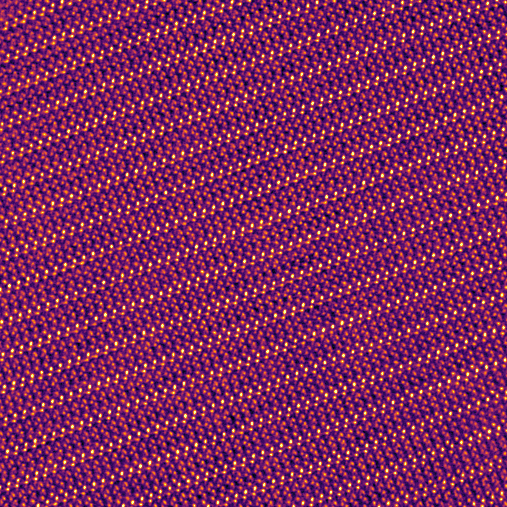
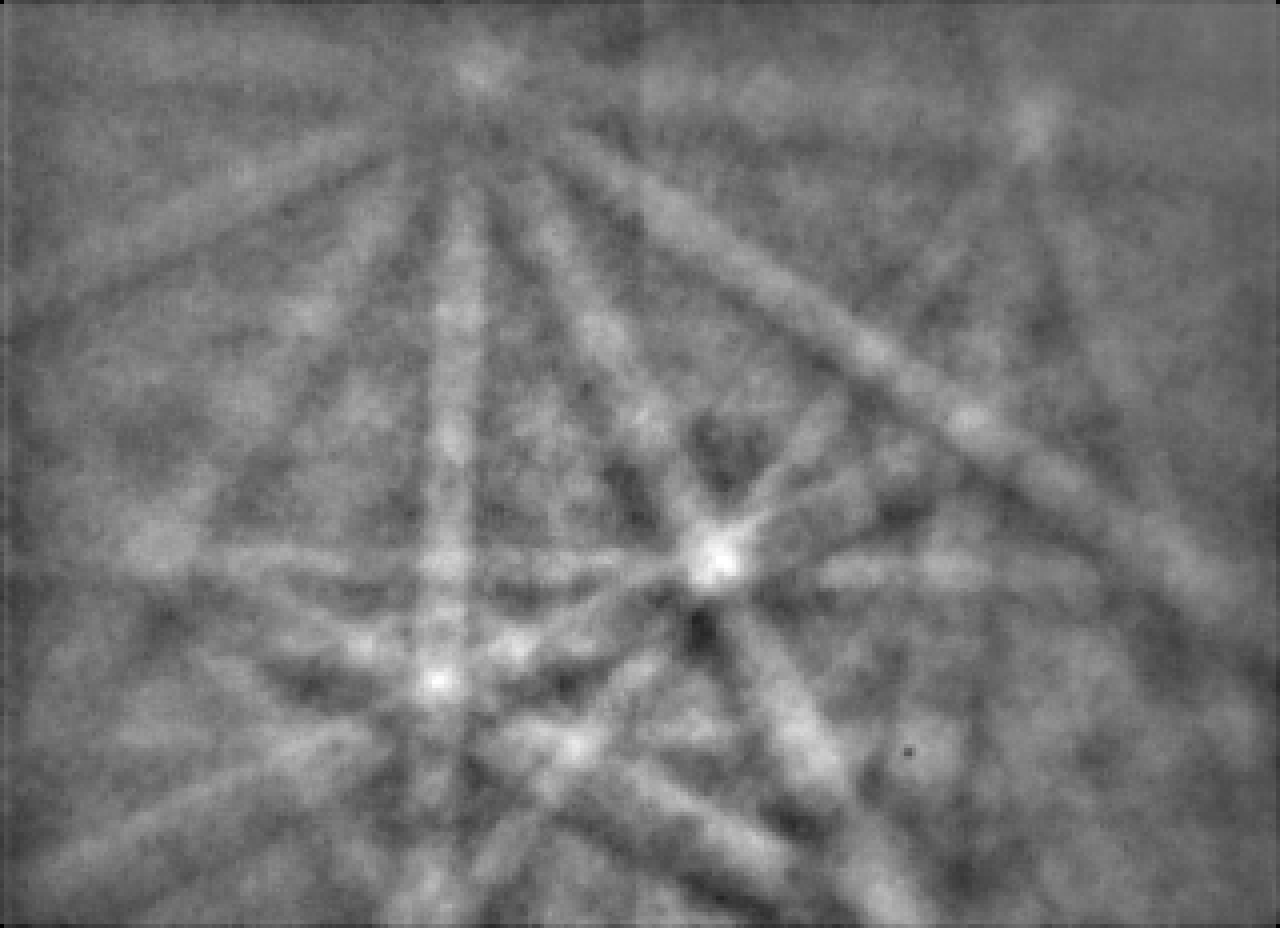
Electron backscatter diffraction (EBSD) within a scanning electron microscope (SEM) is a valuable technique to analyze the crystal structure on the surface. An electron backscatter pattern (EBSP) forms from the coherently scattered backscatter electrons and is acquired with a suitable detector at each electron-beam position, resulting in a 4-dimensional dataset: The scan positions (\(x\), \(y\)) and coordinates in the diffraction pattern (\(k_x\), \(k_y\)).
Many analyses can be conducted from the information-rich dataset. However, one may be limited by the (non state-of-the-art) processing options in the vendor software because the acquired data is often saved in a vendor-specific format. In addition, documentation of the processing steps for GUI-based vendor software is not optimal compared to code-based analyses, hindering scientific reproducibility.
Bruker offers EBSD systems and their EBSD data can be saved as a bcf file, similar to their energy-dispersive x-ray spectroscopy (EDS) data. While for the latter the data can be read using RosettaSciIO, the EBSD data format is not yet supported. Still, the data (raw EBSPs and some other properties) can be extracted using the bcf2hdf5 program from the BCFTools repository developed by Mike Jackson.
This guide shows how to compile and run the current version of bcf2hdf5 to extract the raw EBSPs from the bcf file and convert them to an hdf5 file. This opens up the possibility to use any image processing library on the EBSPs and perform the pattern indexing with 3rd-party open-source software such as Kikuchipy.
Setting up WSL and the required packages
To compile the program on Windows, we use the Windows subsystem for Linux (WSL) with Ubuntu (22.04), i.e., the default Linux distribution for WSL. For Linux users: You can skip to the installation of packages below and use the package manager of your distro (e.g., apt for Debian-based distros or dnf for Fedora).
WSL can be installed following the guide by Microsoft: https://learn.microsoft.com/en-us/windows/wsl/install
After installation of WSL and the creation of a user, we can first update the system:
sudo apt update
sudo apt upgrade
Now we need a few packages for compiling bcf2hdf5:
sudo apt install git cmake g++
I also installed gcc and gfortran, but these packages may not be necessary.
Compiling the bcf2hdf5 program
For the next step, I would recommend creating a new folder in your user directory where you want to store the binaries for the bcf2hdf5 program, e.g.,
C:\Users\your-username\my-programs\bcf2hdf5
on Windows systems. The reason is that a few libraries are linked together, so the compiled bcf2hdf5 program needs to be recompiled if the folder is moved to another location.
Open a new WSL prompt in the created folder by either (i) clicking into the address bar in the Windows explorer and typing wsl or by (ii) opening a WSL terminal and using
cd C:\Users\your-username\my-programs\bcf2hdf5
Clone the BCFTools repository, including all sub-modules and change to the directory:
git clone --recurse-submodules -j8 https://github.com/BlueQuartzSoftware/BCFTools.git
cd BCFTools
Compile the program with cmake by using the following commands:
mkdir build
cd build
cmake ..
make
Wait for the compile process to finish. The binaries are located in the Bin directory within the build directory. Note that you can copy/move the bcf2hdf5 binary from there, but do not move the other binaries as the file path is compiled into the bcf2hdf5 binary.
Beware: Large file size of the generated hdf5
An important note before we use the bcf2hdf5 program: the file size of the created hdf5 can be quite large because it depends on the size of the overview scan, the EBSP size, and the bit depth. The reason: Even if only a small region of interest (ROI) is used for the EBSD mapping, the non-mapped regions will essential be saved as empty EBSPs - with the same bit depth as the actual valid EBSPs. Depending on the EBSD map settings, this can lead to huge hdf5 files.
Two examples:
- 384x255 pixel SEM overview scan, 384x255 full EBSD map. EBSPs are recorded with a resolution of 400x300 pixel and in 8 bit (~75 kB each). This results in a hdf5 file size of about 7.3 GB.
- 1536x1024 pixel SEM overview scan, 80x80 small ROI EBSD map. EBSPs are recorded with a resolution of 800x600 pixel in 16 bit (~939 kB each). This results in a hdf5 file size of about 1.5 TB!
The latter case shows that the file sizes can be quite large. If one has such datasets, a fast external SSD with enough space to convert the data can be used and we can apply “lazy” processing to handle big-data files.
Luckily, we can reduce the hdf5 file size for further processing or storage: If we proceed with processing the generated hdf5 with Kikuchipy or HyperSpy, we can re-save the hdf5 and shrink its filesize back to roughly the size of the bcf (or even smaller), which is typically a few GBs. After this hdf5-hdf5 conversion, we can safely delete the “intermediate” hdf5 file generated by bcf2hdf5.
Using the bcf2hdf5 program
We can use the bcf2hdf5 by either copying the bcf2hdf5 to a folder with the bcf file or vice versa. We then open a WSL prompt and run
./bcf2hdf5 -b input.bcf -o output.hdf5 -r false -f false
with the respective filenames for input.bcf and output.hdf5.
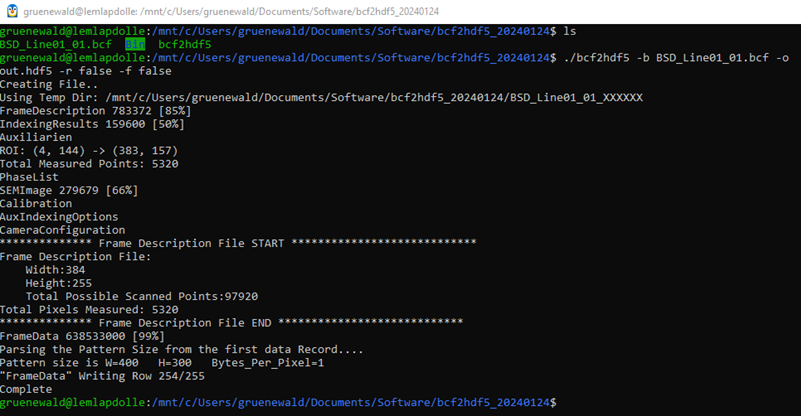
The program should start the extraction and the terminal will show the progress. For EBSD maps where an ROI was used, we can write down the indices of the “ROI: (…) → (…)” output for easier extraction of the valid EBSD patterns later one (e.g., (4, 144) → (383, 157) in the example terminal output below).
Going further: Extracting and reshaping the data with Kikuchipy
The next step is to load, reshape, and finally re-save the data as a new hdf5 file with the help of Kikuchipy and h5py. This will be the topic for another blog post, but a notebook is already available here.